It's been a really, really long time since I created a post here.. but here's a recent turntable I've fixed up: the AT770 Audio Technica Mister Disc by Audio Technica made in the 1980s, also known as the AT727 Sound Burger depending on the region they were sold in. The Sound Burger and the Mister Disc are exactly identical (as far as I know) and I used the service manual for the Sound Burger from VinylEngine to service mine.
Won this pretty thing from an eBay bidding!
I've been looking for this turntable for quite a long time but they go for pretty high prices on eBay for working copies.. and the non-working copies I found were in bad shape until this one came along.. cosmetically it was perfect and the seller mentioned that the motor spins but no sound comes out of the line or headphone outputs.. so it was right up my alley for a good restoration!
So this little thing plays both 33rpm and 45rpm discs and runs on 3 x C sized batteries. It has a single line-level output (red & white RCA), together with 2 x headphone outputs (3.5mm) which I assume allowed couples to bring this on picnics and connect two different headphones to it and listen to music without disturbing the peace, so it is a very nice touch. Nowadays this turntable is most useful at vinyl fairs where collectors can test the vinyl on the spot.. all in all still a very useful and unique turntable to own nowadays!
Powers on okay!
No sound out of the line output, nor either one of the headphone outputs
I knew beforehand that the outputs were not working.. and true enough when I powered it on and spun a record on it, I heard a half second burst of sound from the player's line out before it went silent.. and this indicated to me a clear case of faulty electrolytic capacitors.
Time to start taking it apart!
The service manual is available on http://www.vinylengine.com/ and includes clear instructions on how to strip the turntable down.
Top cover comes off first
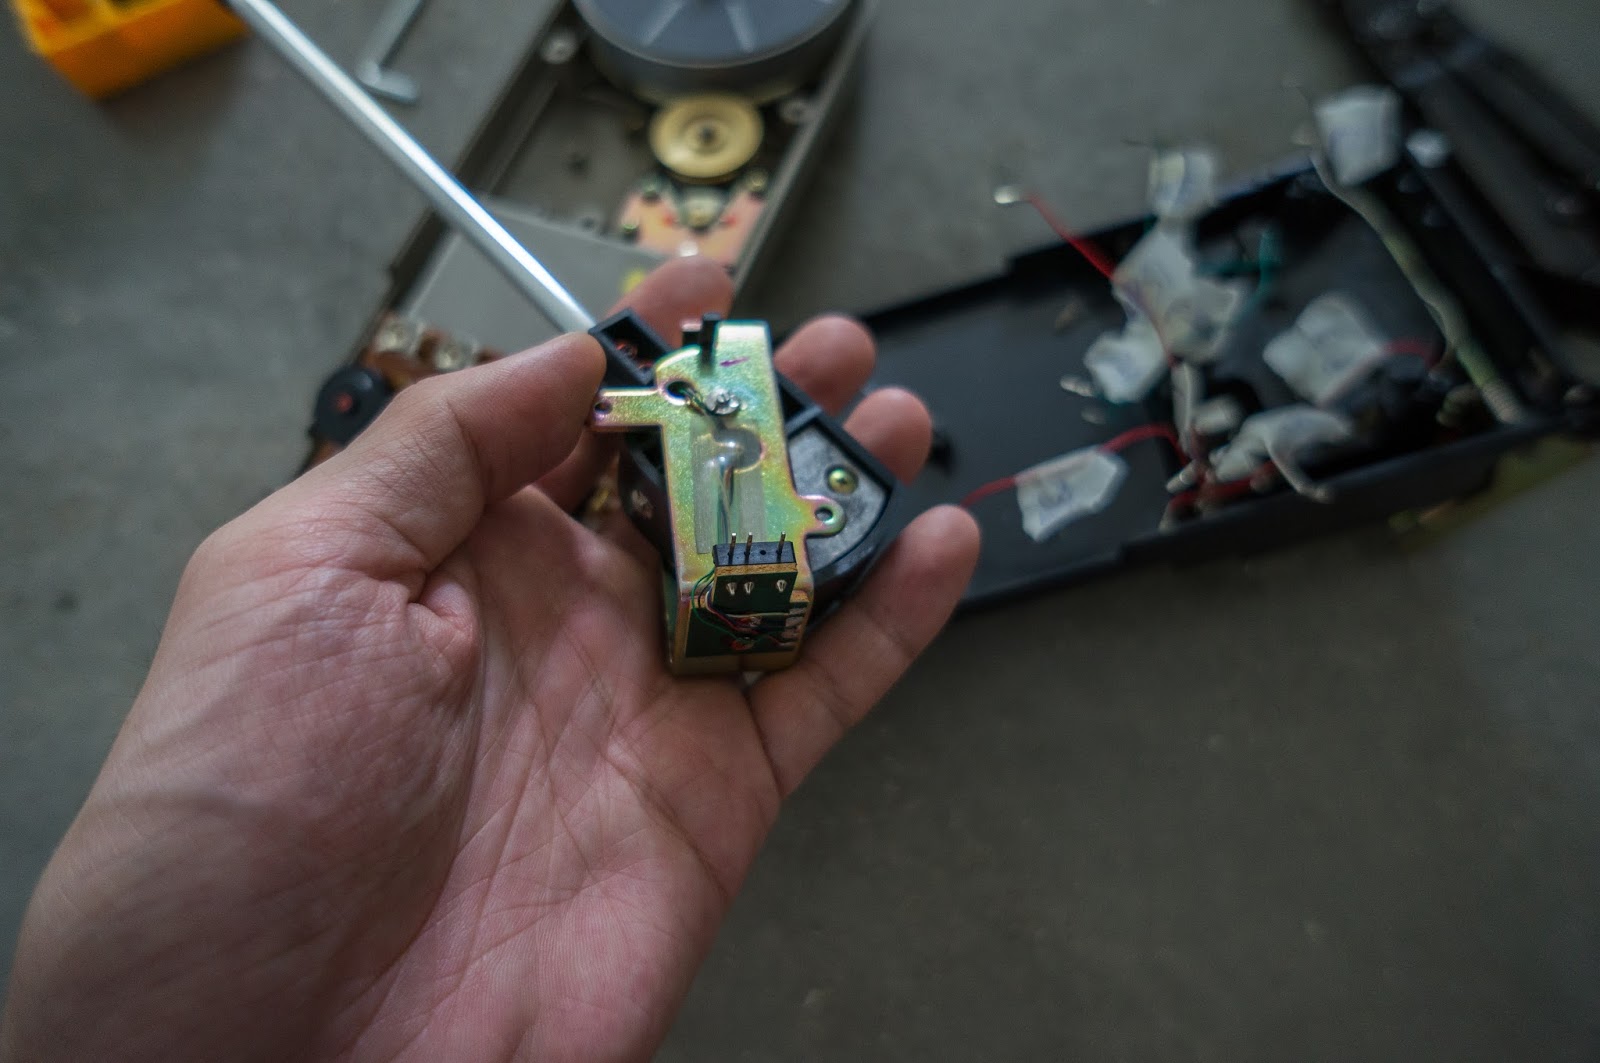
Tonearm comes right off too
The tonearm connectors are pretty small and have to be aligned perfectly before they can be slotted back in
The motor with belt pulley, and the hand soldered circuit board
The motor with belt pulley, and the hand soldered circuit board
The belts seemed fine and didn't need to be replaced
The motor is able to spin at 2 speeds to allow 33rpm and 45rpm operation
Top side of the circuit board with motor control and audio outputs all on board
You can see the dual headphone outputs on the left, and the DC input jack on the right
The turntable also accepts a 4.5V DC input which you can use instead of batteries. But ensure that the polarity of your DC jack is correct before plugging one in!
First step of capacitor replacement: knowing which capacitors to buy
As with all of my restoration projects, the very first thing I would do is to replace all of the electrolytic capacitors as they're usually the first components to fail after a few decades of service.
Koba Electronics, where I usually get my audio grade capacitors
I made a quick trip down to Koba Electronics in Chinatown (Singapore, if you're wondering) where they sell shelves upon shelves of Nichicon audio grade capacitors (my personal favorite) and replaced every capacitor there was to replace.
Nichicon Fine Gold and Elna capacitors as replacements!
Well there's your problem.. a blown capacitor!
A good amount of unmarked wires!
There are a lot of wires connected to pins on the top of the circuit board so it would be a good idea to stick some labels to the wires to make sure you don't get lost trying to put them back together later!
Japanese capacitors in a Japanese machine
Cleaned the volume potentiometer thoroughly for good measure!
I put the turntable back together after replacing all of the electrolytic capacitors and put a record under the needle and IT CAME ALIVE!! But..... for some reason the headphone outputs did not work.. I could hear a very very faint whisper of the the music that was playing. It bugged me for a very long time and I replaced just about nearly every component there was to be replaced.. the tantalum capacitors, ceramic capacitors.. and even spent a day in Sim Lim Tower searching for the replacement line out and headphone out amplifier chips (TA7330p and TA7331p) which I was pretty impressed that some vintage radio shops there still have stock on.
Replacing just about every single component that can be de-soldered and replaced!
Replacing just about every single component that can be de-soldered and replaced!
After all that effort the headphone outputs still refused to come alive.. so I measured the output voltage of the transistor (TR1) and found that instead of outputting a voltage of 3.8V, the voltage was merely 2V! So for some reason the transistor had partially failed but that low voltage was enough to power the line out amplifier ICs (2 x TA7330p) but not the headphone out ICs (2 x TA7331p).
I found an equivalent transistor TIP41 which was quite a lot bigger than the 2SD471 but it could fit into the case with no problems so in it went!
TIP41 replacement transistor.. a lot bigger than the 2SD471
Large.. but still able to fit just fine..
Replacement needle ATN-103
Lastly for even more good measure I bought a replacement needle (also from eBay) ATN-103 and installed it on the tonearm.. powered it up.. connected some headphones to the outputs and heard wonderful music!
i bought this thing online and waited a long time for it to ship from halfway around the world. it was a gamble because i know from the seller that the motor on the player spins but the sound doesn't work at all and it would be worthless as a record player if it didn't make any noise whatsoever!
so anyway, this is an Emerson Wondergram made in the 1960's. as you can see it is a battery powered portable record player that plays both 33rpm and 45rpm discs...a 'Wonder' for its time and weighs a 'gram' (ok not really, but see what i did there? hurhurhurhur) it comes with a holder on the top cover for a 45rpm adapter too which is pretty neat.
*EDIT* i totally forgot to mention that this player originates from the UK made by a company called Baird, but sold in the USA under the Emerson brand. the player has the Baird brand on the bottom plate that say "Baird, Made in England, A Camp Bird Product" (what is Camp Bird anyway?)
*EDIT* in case you're wondering the size of this, here's a tissue box for comparison:
when it first arrived, the motor spins but sounded like a jackhammer. when i tried to put the needle on a record, the entire player just ground to a halt. obviously the motor just didn't have the juice and was in need of some restoring.
opening it up isn't hard, just remove all the screws you see on the outer shell and you can lift the innards all out. as you can see from the pictures above, this thing was hideously dirty and dusty inside. the dampening sponges under the speaker and the motor were hardened and flaking debris each time i moved it, in short it was a real mess.
the way the motor runs the records at 33 and 45rpm is a real curious thing as it doesn't 'directly' spin the record like in a normal player. you can see the motor in the picture above and the shaft is touching one of the two rubber wheels. when the motor spins, it turns both wheels as well. the clever bit is that both wheels are set at different distances and this enables it to play records at either 33 or 45rpm.
when you put a 45rpm record that has a smaller diameter than a 33rpm, it would only touch the inner wheel that spins the record faster since the wheel is nearer the center of the record. when you put a 33rpm disc it will touch the outer wheel. since the 33rpm wheel is further from the center of the record, a 33rpm record would not touch the 45rpm wheel at all because that wheel is smaller...ingenious!
after inspecting the circuit, checking for continuity, dry solders, cracked solders, broken wires, etc etc...i spotted this in the picture below:
well there's your problem! the capacitor across the speaker is obviously blown and its guts have leaked out. it needs to be replaced.
as you can see, i have a big thumb. and also this capacitor is 100 micro farads and rated for 6 volts. my brother was kind enough to explain to me what this capacitor is for (to convert a DC signal into an AC one so that the speaker would work) and even drew a diagram out.
the entire circuit in the player only has 3 capacitors. one going to the speaker (100ufF, one on the motor (100uF) and one on the main circuit board (10uF). i decided to change all 3 to modern day equivalents and although that's not the purist way to restore antiques, it is hard to trust 40 year old electronic components to last very long nowadays (if you can find them!).
the picture below shows the difference in size of the original capacitor and its modern day equivalent. i couldn't get my hands on a 6V rated one and got a 16V one (it doesn't matter).
while i was changing the capacitors, i managed to break some wires just by moving the player around my desk. the wires were all corroded and i replaced all the wires (not a lot, about 7 all in all) with new ones.
so its out with the old and in with the new!
the solders in the picture above shows that this machine was obviously assembled by hand. i used new solder for the new wires, and resoldered all the old solders as well just in case there were dry...i figured this would ensure there were no breaks in the circuit and give the player another few decades of life.
the single speaker has the brand 'ELAC', i googled the brand and apparently it's still around today...they must have partnered with Emerson back in the day when this player was produced.
on the left side in the picture above you can see the auto stop mechanism. when the arm reaches the end of the record the mechanism will push away a metal contact, opening the circuit and stopping the player completely.
after resoldering, rewiring and replacing the capacitors, i worked on the cosmetics of the player because it was heinously dirty! a quick polish with the novus plastic polisher (previously used on the westclox alarm clock) and it gave the shell a nice sheen to it. (before and after on the left and right respectively)
ok...granted it's not much of a difference but it'll take ages to buff the scratches away, i'll leave them there for the 'rugged' look.
*EDIT* you can see the Baird brand between the two upper legs in the picture above
i managed to order a new needle online to replace the worn out one that came with the player, no prizes for guessing which is the new and old needle.
in case you're looking for the needle for this machine, it is an electro-voice 51 (ev51). it is a ceramic cartridge and has 2 sapphire tipped LP points (so more bang for your buck because its two needles in one!).
so anyway all that was left was to slap in new fresh batteries (4 x C-sized, in case you're wondering) and test it out...and it works!
i don't want to set the world on fire, by the ink spots...made famous all over again by a game called fallout 3.
i didn't fix this turntable, nor did i restore it in any way...this actually belongs to my father and i got it on a long term loan from him since he didn't really use it that much (nowadays, but it has surely been used for many many hours by now) and he's been keeping it in a good and working condition for about three decades.
anyway i have recently been extremely intrigued in records ever since i got my hands on the gramophone and brought it back to life and although i'm really lagging behind in terms of music technology, i think many people have been missing out on something.
records are difficult to maintain...they require a good cleaning with a velvet brush before every listening to get the dust out of the grooves otherwise you'd have clicks and pops. i have a cleaning solution specially just for the disc, and another different cleaning solution specially for the needle. troublesome...troublesome...but that's why it makes everything better.
it's just something about the tediousness of setting everything up that makes you appreciate the sounds even more, it's also something about the concept of being able to hold analogue music in a physical form instead of ones and zeros that makes it simply wonderful. on top of all that, i think the sounds coming from a vinyl disk sounds so much warmer and natural than from other mediums...plus they all come in a big folder that is so much easier to read than a standard CD album.