It has been a long time since I made any new posts because I am no longer that free anymore as I am now working full time.
But today I finally got around to replacing the 'dangerous' selenium rectifier that is present in the Mitchell Model 1265 turntable that I restored some time ago. The rectifier can apparently fail catastrophically and emit poisonous smoke during use! I thank the person who left the comment here on this blog highlighting that fact to me.
I am not good with hardware and circuits, so I had no clue on what to replace the rectifier with. A good consultation with my more technically inclined brother revealed that I only required a modern day IN4007 diode to replace it: a very simple and quick fix!
This is the modern day diode versus the selenium rectifier (the component with the multiple gray square plates).
It only took me about 5 minutes but took my brother a good half an hour of circuit tracing and Googling!
After everything was done, I plugged in the player and it was still working like before...and now it is slightly more future proof and will hopefully last for a very very long time!
i have been spending the past few weeks integrating and programming the SolderTime2 to work with a BMP085 barometric pressure and temperature sensor and it finally works the way i want it to. it now functions like a (very) poor man's Tissot T-Touch (okay..just the barometric functions and not the touch functions).
the I2C port on the SolderTime2 makes it possible to add a whole lot of other I2C sensors (gyroscope, compass, humidity) to the watch as long as the additional modifications to the program does not bust the total amount of memory available on the watch which is 32kbytes.
i removed the worm animation mode as well as the scrolling text mode on the watch to free up some space in the flash and i have already used up about 26kbytes but i think it is largely due to my inefficient code! (still a work in progress)
amazingly i also found that a tin of Milton Pastilles Candy (commonly sold in Singapore) has the exact diameter of the watch's front cover, give or take a millimeter or two, and can be modified to fit the watch with the additional sensor. i haven't worked on the tin yet but that will come later on when i have the time to get around to do it.
the positive end of the battery goes to Vin and the negative goes to ground. after some simple circuit tracing, i found that the SCA and SCL ports can be wired to from the two resistors on the top left of the watch. the left resistor being SCL and the right resistor being SCA.
the ground of both batteries have to be connected together for the sensor to be able to recognize the data coming from the watch. i did not know this and spent a long time troubleshooting before my brother explained to me that it is required otherwise the sensor has no common reference to zero and any signal i send over is unrecognized. (wasted good portion of my life finding that out)
*EDIT* i forgot to mention that the BMP085 sensor board from adafruit includes 10k pullup resistors for the I2C ports and they need to be removed by simply touching a solder to the resistor and taking them off. 10k pullup resistors are already provided on the watch, in fact the modification wires are soldered to the resistors themselves.
i have programmed the watch with an additional mode "ALT" to display the altitude above sea level in meters and also to be able to set the localized sea level pressure (obtained from any local country's weather website, also known as QNH). in this case, the pressure in singapore at the time of making the video posted at the beginning of this blog post was 1,008.14mb and when i set it to that pressure it displays 48.5 meters above sea level which should be correct as my location was situated on top of a hill.
it also has a mode "TEMP" displays the current temperature of the sensor, and the temperature goes up when i put my finger on the back of the sensor's PCB.
i will be happy to share the codes with anyone interested to make this modification to their SolderTime2, just drop me an email and i will send them over!
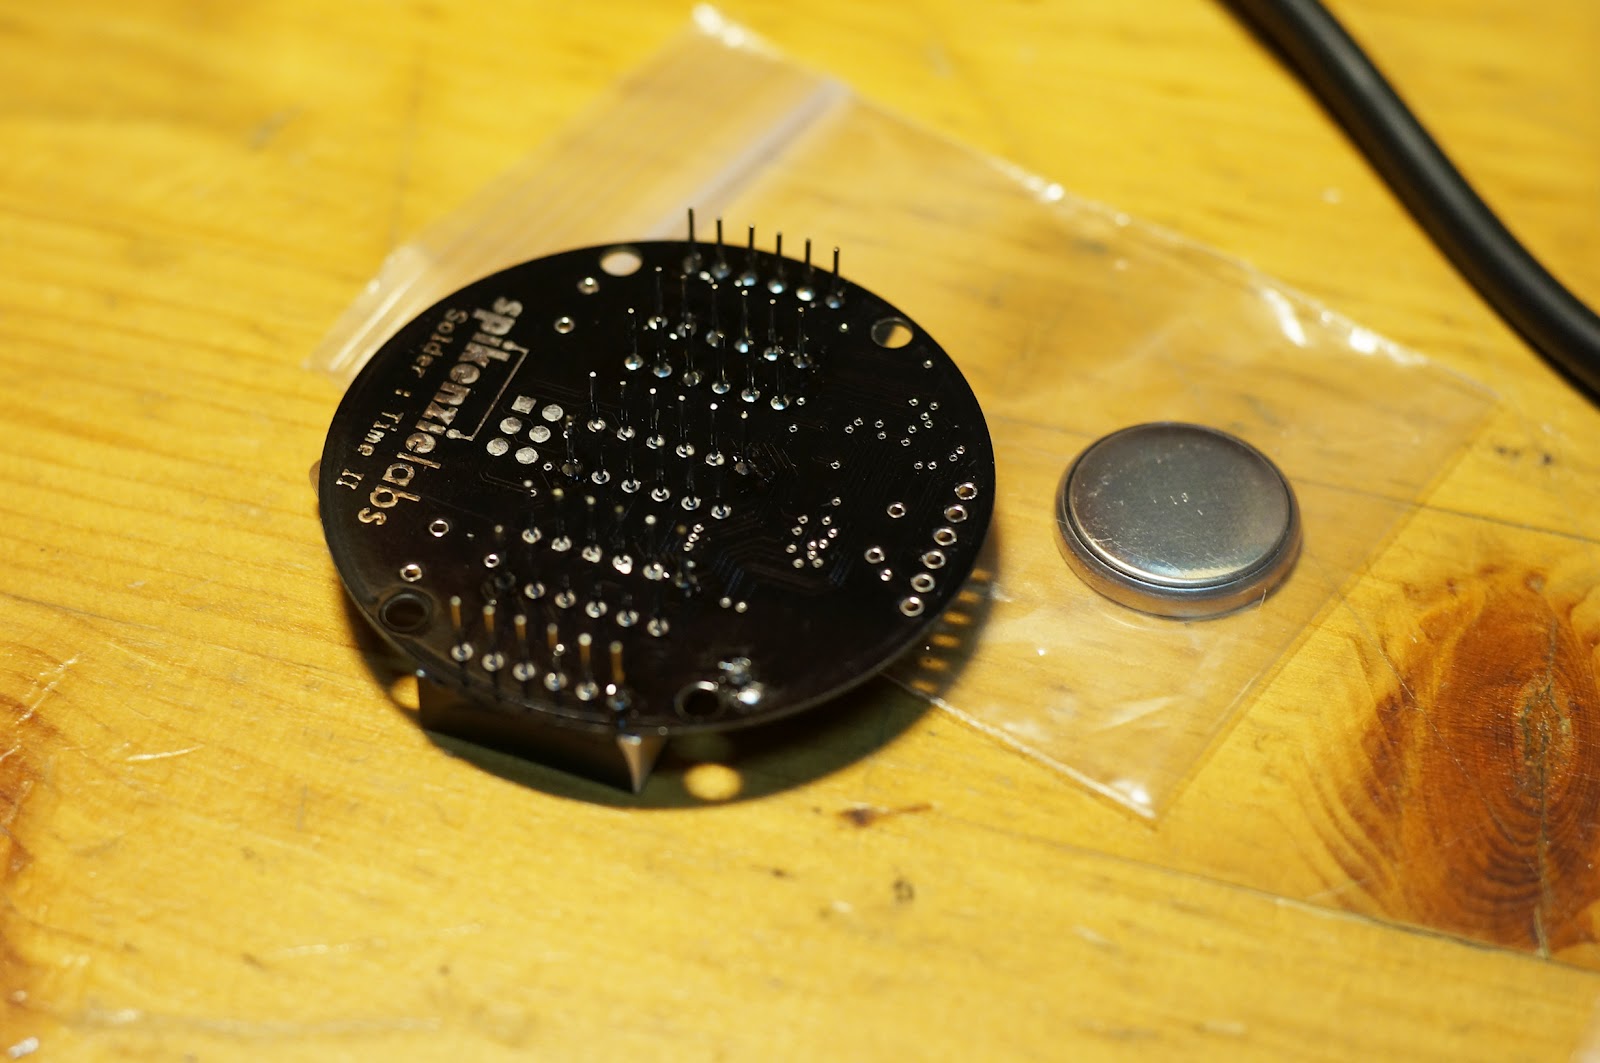
this was a DIY watch kit i bought a few weeks ago that finally arrived here yesterday. it is basically a microprocessor programmed and designed to function as a watch. it is completely 'hackable' which means that you can create and flash your own programs to the microprocessor and make it do whatever your creativity allows you to do.
its very easy to assemble and all i needed was a soldering iron, solder, and a pair of wire cutters. SpikenzieLabs have very clear and easy to understand instructions on their website here:
it cost $59.95 USD for the kit, and if you want to upload your own sketches to the microprocessor you will need an FTDI cable. since i didn't have one around i bought one from adafruit as well here:
it's no rolex obviously...but it is a great introduction to C++ microprocessor programming!
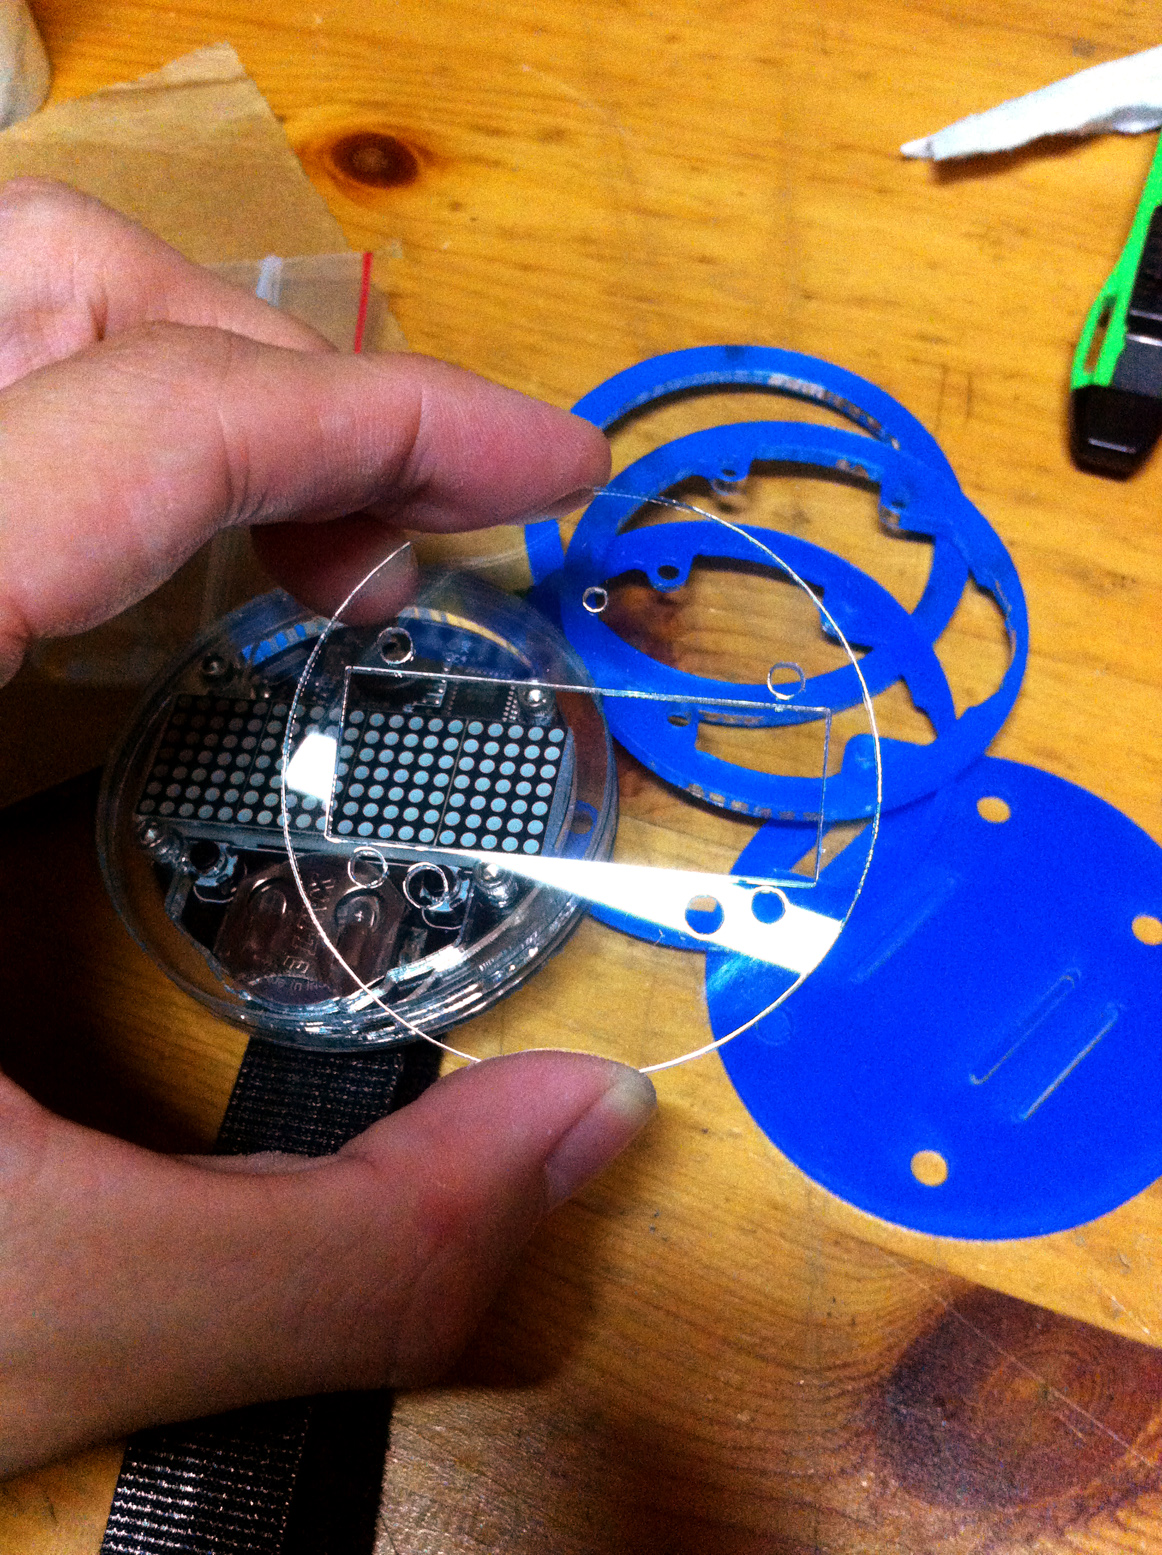
you only need to install the battery holder, buzzer, two push buttons and four LED arrays and you're ready to go.
UNFORTUNATELY for me, the acrylic top plate of my watch was cracked on two of the four supports holding the plate together. the plate is still held together but i'm afraid any sort of pressure would snap it easily. i sent out an email to adafruit in hopes that they will send me a replacement or something but i don't know what is their policy on this. the other pieces of acrylic are fine but the top piece is the thinnest and might have cracked during packaging or in transit. i will update this post accordingly if they get back to me with a replacement.
*UPDATE* they got back to me really quick! and they've agreed to send me a new replacement plastics kit! *UPDATE 2* i have received the replacement kit today! 10 days after they said they'd ship another to me. i won't be removing the issue about the cracked acrylic because i want everyone to know what great customer support Spikenzielabs have given me! I have plans to add an additional I2C device to the watch in the coming weeks and would probably make my own casing for the watch but I will definitely be reusing the front plate for my next project.
that aside, the watch worked fine when i put the battery in. the latest sketch was already pre-installed into the watch. i followed the instructions on SpikenzieLab's website and got the Arduino IDE on my laptop and spent some time reading and understanding the codes. if you have done any sort of microcontroller programming before it should be easy for you to understand how the program works. i have never touched any sort of Arduino before but it is all pretty straightforwards.
the programming (FTDI) port is located on the back of the watch and to upload your own sketch you just need to stick the pins of the FTDI Friend (for my case) into the port. make sure the correct pins go into the correct ports! the FTDI Friend needs some basic setting up on your computer as well but again, the instructions can be found online and is easy to follow:
the LEDs on the FTDI Friend will blink if the sketch is being uploaded. the pins do not click snugly into the programming port and the website suggests using a light diagonal force to ensure they make contact with the connectors and this is what i did in the picture above.
for a quick demonstration i just changed the scrolling text message to "Hello World" and set a slower scroll speed than the default one. i uploaded the sketch and sure enough the scrolling text showed the change:
this watch is HUGE and honestly hard to match with any outfit unless you're going to an electronics themed club or party. but as i mentioned before it is a very interesting way to dabble with simple programming and you get a cool watch out of it all!